Index
Setup
Recording Sequences
Detecting Sequences
Deleting Sequences
Setup
To start setting up the Sequence Pose Recognition System, A data asset must be created.
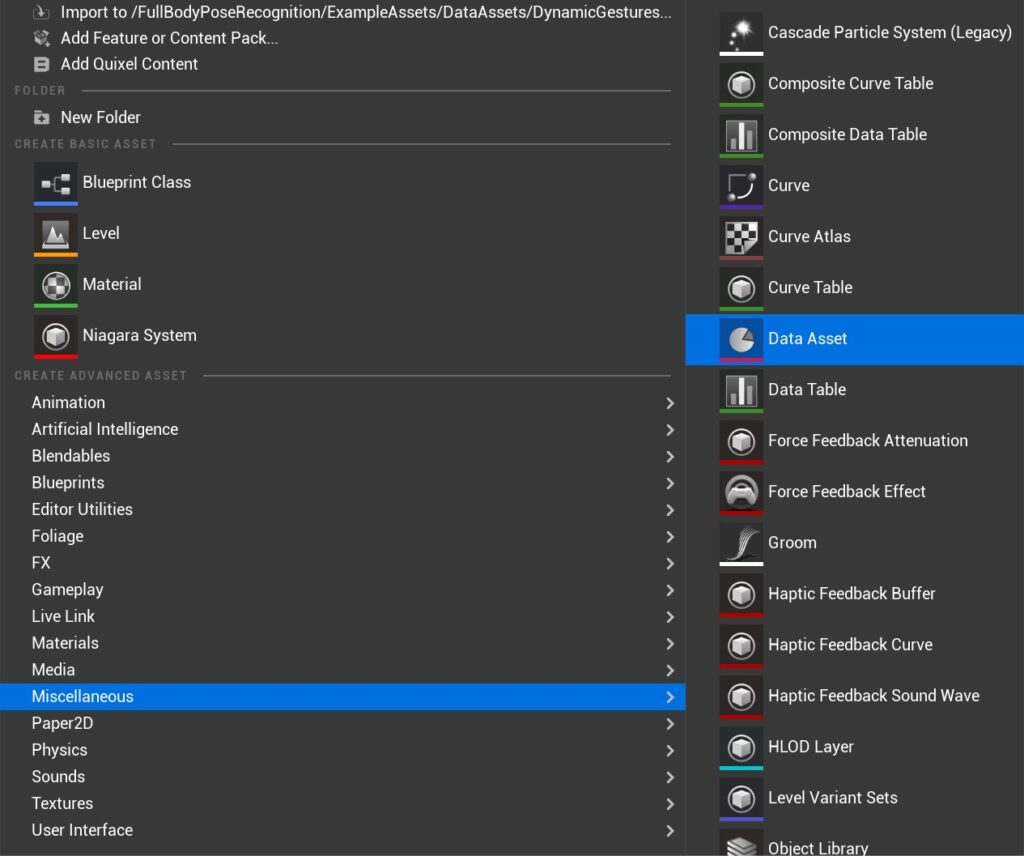
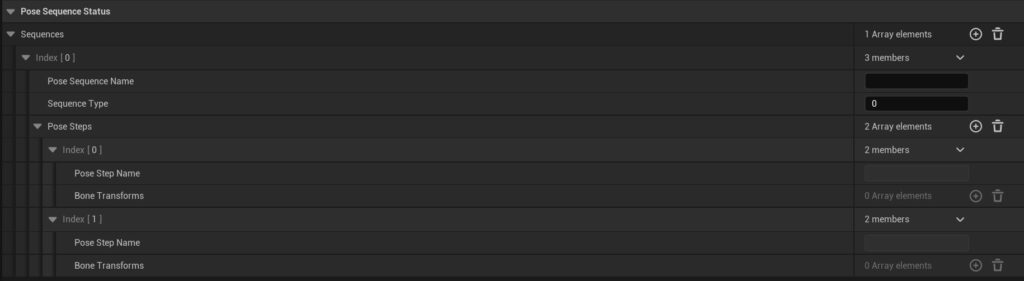
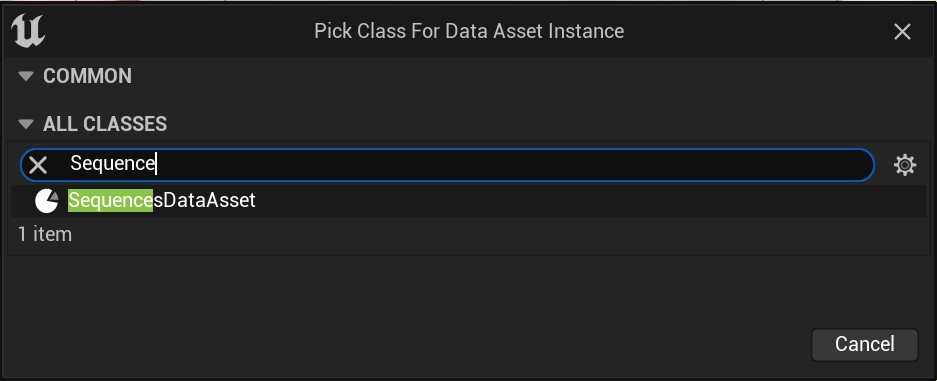
The data asset must be of type SequenceDataAsset. Any other data asset type will not be accepted by the system. The sequences which will be recorded and detected will be saved in the data structure. There is no need to add elements to the data asset since the system will add sequences through recording.
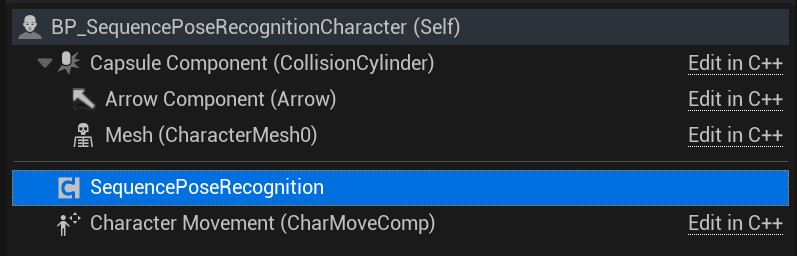
The sequence pose recognition is an actor component that can be added to a character or a pawn. To start setting up a pose recognition character add the actor components to an actor, pawn or character.
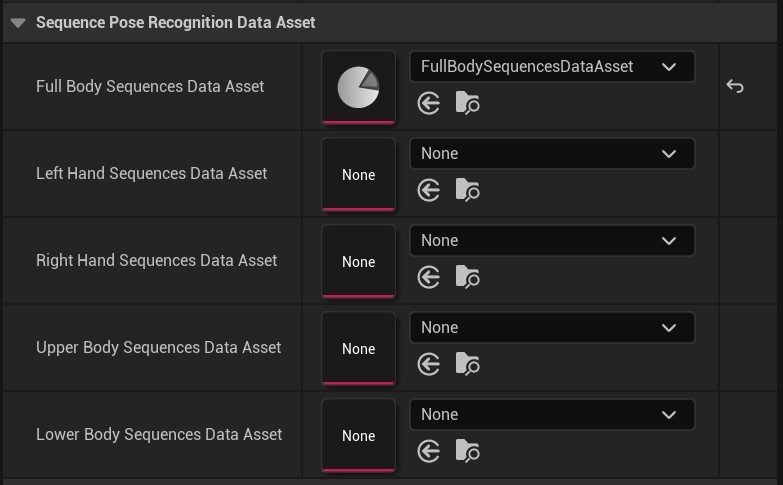
In the sequence pose recognition component, under Sequence Pose Recognition Data Asset, the right data asset must be assigned to the corresponding data asset slot.
Important: The body area which will be used must have its own data asset. Not assigning a data asset to a body part will disable recording for the body part.
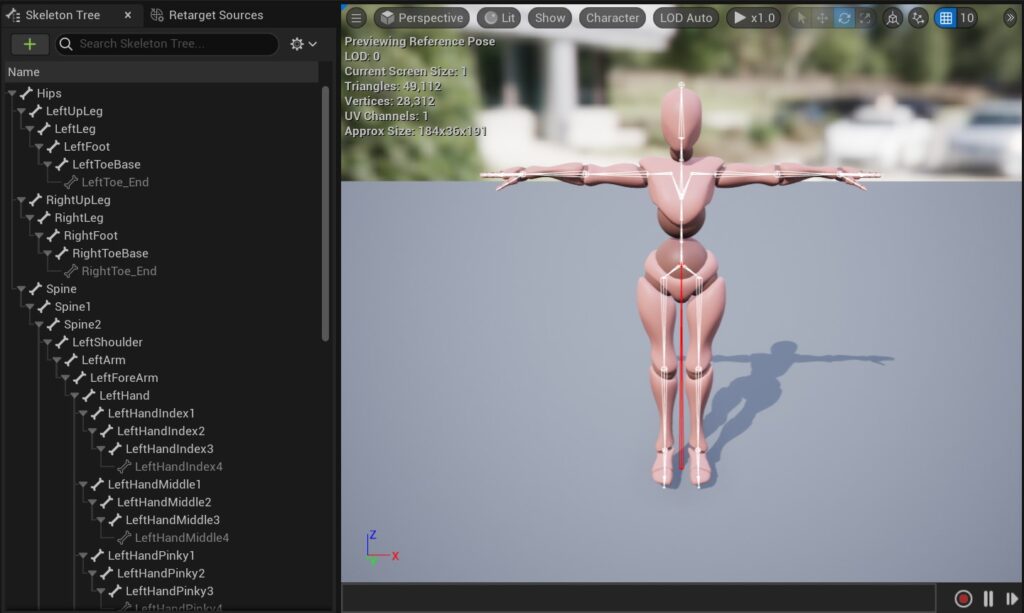
Important: A pose recognition character or pawn must contain a skeletal mesh component.
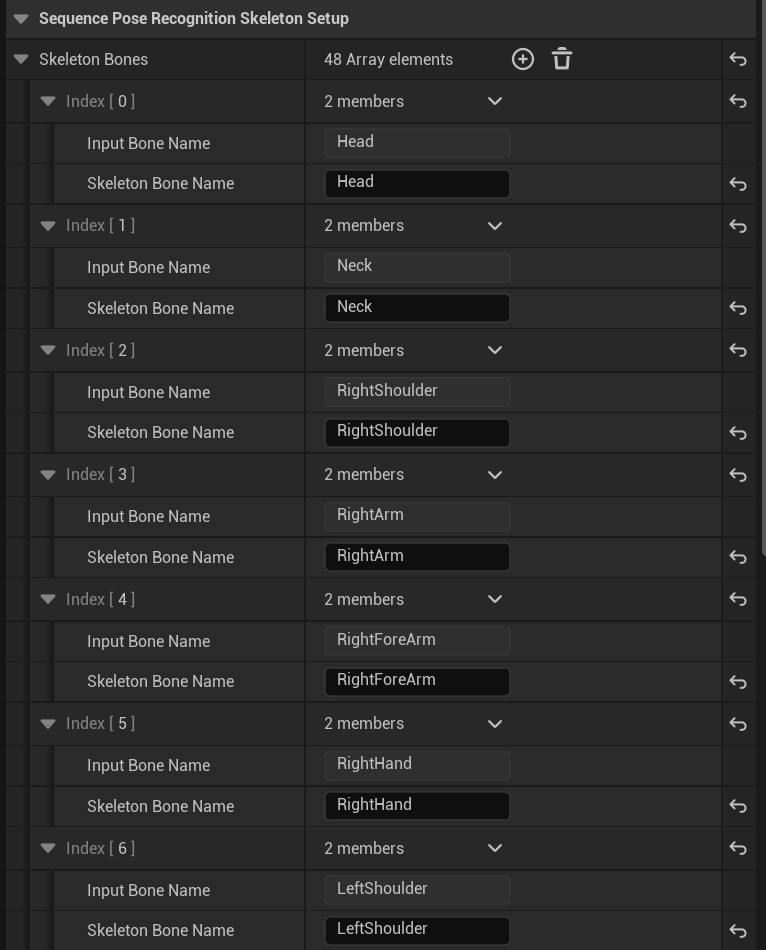
In the sequence recognition component, under Skeleton Setup, the bone name must be assigned to the corresponding array element.
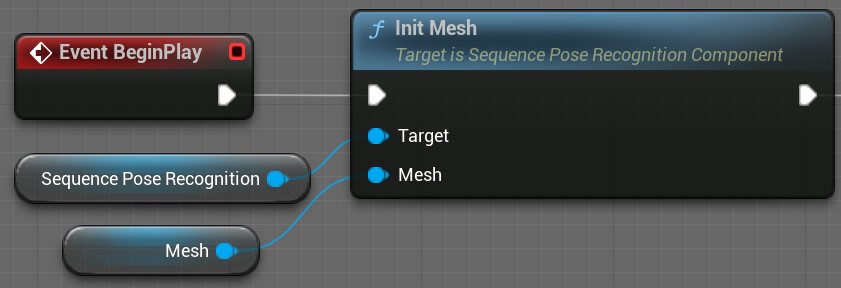
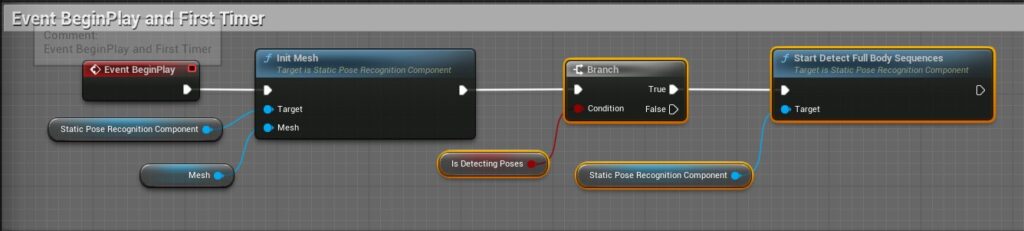
Lastly, in the EventBegin event, the InitMesh function must be called with the Skeletal Mesh as a parameter.
Recording Sequences of Poses
The sequences system includes sequence recording for full body, left hand, right hand, upper body and lower body.
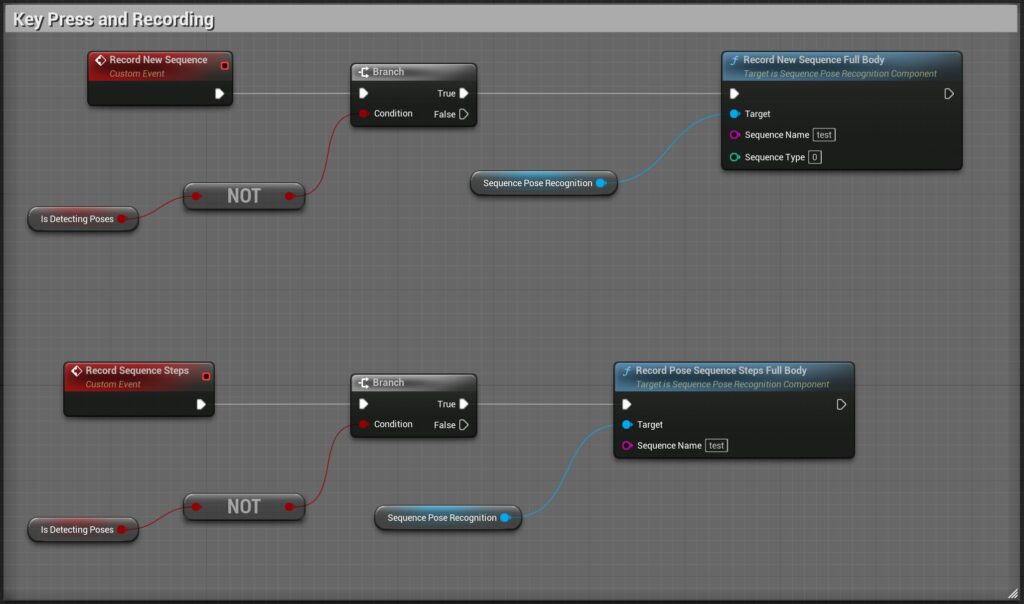
Tip: The functionality of detecting and recording should not run at the same time. To ensure that does not happen a boolean variable can be made to decide if the system is detecting or recording poses.
Recording a sequence involved two steps: creating a new sequence and adding steps to the sequence. These two steps must be linked to different button presses.
When creating a sequence, the node requires a sequence name and a sequence type. These variables can be edited in the data asset after recording. The name does not need to be different, as the system will make a new entry for a sequence and save it in the data asset. The name should be changed before starting detecting poses so that every pose has a unique name. When the sequence is created, the first step is also created, thus the result will be a new sequence with one step.
When adding steps, the node requires the sequence name to which steps will be added. If there are multiple sequences with the same name only the first one will be edited.
Tip: The best workflow is to create multiple sequences, change the name in the data asset, then add steps.
Detecting Sequences
The first step in detecting sequences is binding events. There are four events per body area when detecting sequences: first step found (sequence started), step performed, sequence completed and sequence failed. The first step found event will return a string with the current sequence name.
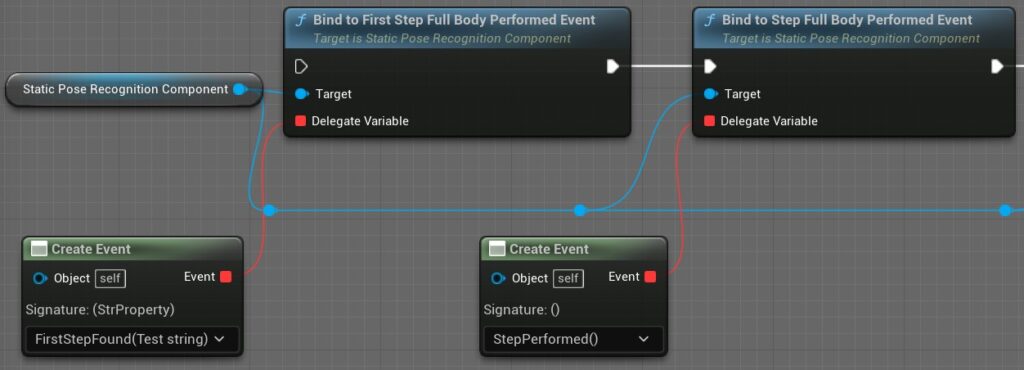
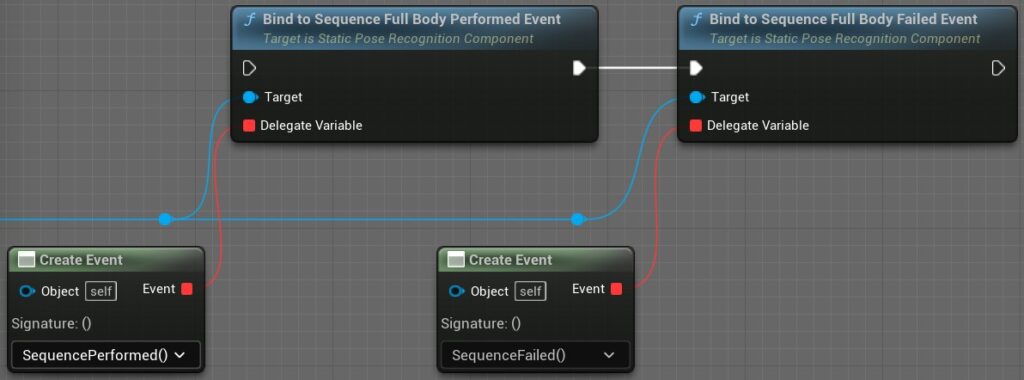
Different events can be made to be bound to the dispatcher. The system gives access to the current body area pose type.
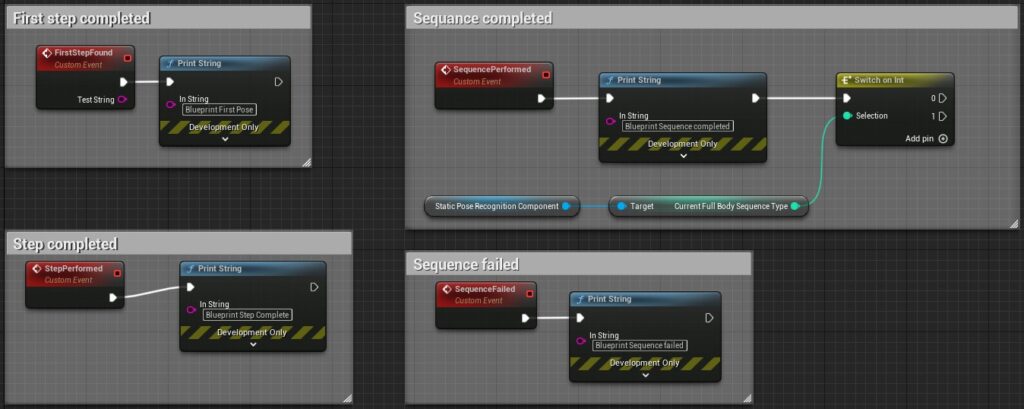
After binding to events, the StartDetect_BodyArea_Sequences function must be called once (E.g., in Event BeginPlay or performing an input action).
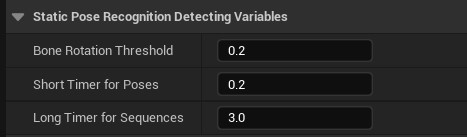
In the sequence pose recognition details panel, under sequence pose recognition detecting variables, a threshold and two timer variables can be set. The time variables are in seconds. The threshold should have a value between 0 and 1. The short timer refers to the time it takes to detect the poses in a sequence. The long timer refers to the time it takes for the sequence to fail if the steps are not completed.
Example: The system is searching for the first pose in the list of sequences every short timer = 0.2 seconds. When the first step in a sequence is found the long timer = 3 seconds. Every time a step is completed the long timer resets. If the step has not been completed by the end of the long timer, the sequence fails.
Deleting and Editing Sequences
Deleting and editing can be done within the data asset. The sequence name and type can be edited. The steps cannot be edited but they can be deleted.